


Custom Shipping Box
Protect your products and elevate your brand with custom shipping boxes engineered for durability and designed to impress. Made from heavy‑duty corrugated material and printed in vibrant full color, these boxes ensure your items arrive safely while reinforcing your brand at every touchpoint. Perfect for eCommerce brands, fulfillment centers, and growing businesses that need reliable packaging that looks as good as it performs.
Why Brands Choose Box Genie's Custom Shipping Boxes
- Heavy-duty corrugated build for safe transit
- Full-color, edge-to-edge digital printing for standout branding
- Custom sizing and design options tailored to your needs
- Low minimums (100 box units) with volume discounts
- Fast production turnaround: 10–12 business days after art approval
Minimum & Maximum Quantities
Box Genie offers custom box orders starting at 100 units with no maximum limit. For custom box inserts, the minimum order quantity is 250 units.
Pricing decreases with larger volumes, and Box Genie provides first-time and bulk discounts.
Materials & Product features
Box Genie offers two flute types for corrugated packaging:
- E-Flute: Ideal for lightweight items, providing strength and crush-resistance for mailer boxes.
- B-Flute: Suitable for heavy products, offering increased resistance during shipment, commonly used for shipping boxes.
For specific fluting needs, please call (816-414-3000). Our corrugate is made of recycled content and fully recyclable.
Packaging Dielines
Easily download and retrieve your dielines with our step-by-step guide: learn how here!
Print Methods
Box Genie is a G7® Certified Printer using GRACoL® 2013 settings for top-quality prints. We primarily use digital printing with water-based inks for vibrant graphics. Flexographic and lithographic printing options are available for specific needs.
Contact our experts for litho and flexo printing requirements.
Note: Paper type choice affects color vibrancy and printing precision.

Self-Design Your Custom Shipping Boxes
Start by entering your box dimensions, paper type, print quantity, and unit amount. Then choose how you want to begin your project:
-
1
Option 1: Design & Order in the Design Studio
Select “Design Your Box Now” to create your artwork directly in our 3D Design Studio, then proceed to checkout. -
2
Option 2: Order Now & Send Us Your Design
Select “Order Now & Upload Later” if you prefer designing in Adobe, Canva, or another program. Your order confirmation email will include full artwork instructions

How to Download Dielines
Create a custom‑sized dieline (template) to design in our Design Studio or in your preferred design software.

Add a Logo to Your Box
Easily add your brand’s logo, tagline, or other graphics to any of our box styles in just a few steps.

Placing Your Box Genie Order
Submit your approved artwork and get your order into our production queue using one of two methods.
Choose Your Paper Type

Kraft
Matte Finish
Known for its warm, natural tone, Kraft paper brings an organic, handcrafted feel to any design. Dark inks print with rich depth, lighter colors take on a slightly deeper, more muted character.
- Natural Aesthetic
- Most Cost-Effective
- Fully Recyclable

Essential White
Matte Finish
With its clean matte finish, Essential White delivers a soft, understated look. It’s a budget‑friendly option that still provides reliable print quality and consistent color.
- Soft, Neutral Tone
- Cost-Effective
- Fully Recyclable

Magic White
Semi-Gloss Finish
Designed for maximum vibrancy, Magic White delivers rich, HD color on a smooth semi‑gloss surface. It’s the go‑to choice when you want artwork to look crisp, bright, and eye‑catching.
- Boosts Color Intensity
- Ideal for Premium Branding
- Fully Recyclable
WHAT OUR CUSTOMERS ARE SAYING:


Reliably Fast, Remarkably Crafted
Our Missouri facility features state-of-the-art printers and cutting machines, enabling us to produce eligible box orders in just 10-12 business days or less. Thanks to our strategic central location, Box Genie orders reach their destinations quickly.
Every packaging project adheres to strict quality standards from order processing to carrier handoff, ensuring you never have to sacrifice quality for a tight deadline.
FAQs
How do I find the measurements for my box?
Please note that it is an industry standard to almost always present the inside packaging measurements of custom boxes. These are displayed as L x W x D (Length x Width x Depth) in the unit of inches.
- Lay out the item or items on a table or flat surface just as you wish to display them in the final packaging.
- Measure and record the L x W x D.
- Finally, round up to the nearest 1/16 of an inch for each measurement. This will ensure every item is packaged just right.
Is there a minimum order quantity (MOQ)?
We offer low minimum order quantities, making it easy for small businesses, startups, and growing brands to order custom packaging without large upfront commitments. Our MOQ for custom box projects is 100 units.
Do you offer bulk discounts?
Yes, we provide tiered volume pricing, so the cost per box decreases as your order size increases. It’s a great way to save on packaging if you ship frequently or need larger quantities.
Do you offer full‑color printing?
Absolutely. We use high‑resolution digital printing to produce vibrant colors, crisp details, and edge‑to‑edge artwork. You can print logos, patterns, illustrations, or full‑panel designs to create a memorable unboxing experience.
Can I upload my own artwork or logo?
Yes, you can upload your artwork directly into our online design tool. We support all major file formats and provide dieline templates to ensure your design prints accurately.
Do you have design guidelines for me to reference?
Yes! Please reference our Design Guidelines for our full set of best practices.
How do I design my custom box offline or in a different program?
Box Genie supports designs generated in a program outside of our online design tool.
Start by selecting your desired box type from boxgenie.com. Next, enter your box dimensions, paper type, and the number of printed sides (inside, outside, both). From here you will have two options:
- Select "Order Now": You will receive email instructions on how to submit your design.
- Select "Design Online": You will enter the 3D Design Tool. Choose "More" > "Download Template" from the left-hand panel.
Once your artwork is complete, revisit boxgenie.com. Submit your template from the "Upload Completed Template" option in the 3D Design Tool.
Alternatively, you may submit your template via live chat or email with a dedicated Box Genie representative. Our team suggests using Adobe Illustrator to create your artwork and convert it into a PDF. If you using Adobe Photoshop, you will need to design in CMYK at 300 DPI and 100% of the finished size. If using a different app or file type, please reach out to our Support Team (help@boxgenie.com) for assistance.
Note: It is important that you do not flatten your dielines into the graphics.
What are custom boxes used for?
Custom boxes are used for eCommerce shipping, subscription boxes, retail packaging, product protection, and branded unboxing experiences. Whether you’re shipping directly to customers or stocking shelves, custom packaging helps elevate your brand and keep products secure.
What materials are your custom boxes made from?
Our custom boxes are crafted from corrugated cardboard, a sturdy material commonly used for shipping and retail packaging.
Each box provides a reliable surface for high-quality printing and is made from recyclable, eco-friendly materials. You can select your preferred paper type directly when ordering, and flute options are available upon request.
Can I order a sample before placing a full order?
Yes! If you’d like to order a sample of your custom box, simply set the quantity to 1 when placing your order.
This lets you see the size, material, and print quality before committing to a larger quantity. It’s the best way to confirm your design and make sure the box works for your product.
Who can I contact for help with my order?
Our support team is available to help with artwork setup, sizing questions, order details, and more. You can reach us via email, phone, or live chat.
Quick & Easy Assembly


Our Shipping Boxes are Ideal for:


Mailer Boxes vs. Shipping Boxes:
Choose the Right Custom Box for You
Discover the key differences in materials, print options, and use cases to choose the best custom packaging for your brand.

Custom Mailer Boxes |

Custom Shipping Box |
|
|---|---|---|
| Best for | Branded packaging, eCommerce shipments, gifting, and subscription boxes | Heavy-duty shipping, branded bulk orders, or warehouse distribution |
| Recyclable Corrugated Material | ✓ | ✓ |
| Durability | Ideal for lighter to medium-weight items | Built for heavier or multi-item shipments |
| Unboxing Experience | Premium: sleek presentation, ideal for brand-forward storytelling | Thoughtful: spacious box interior allows for protective dividers and bold interior printing |
| Material | Single-wall corrugated (E-Flute)* | Single-wall corrugated (B-Flute)* |
| Print Options | Fully customizable inside and out; great for logos and patterns | Fully customizable inside and out; perfect for large, high-impact branding |
| Ideal Use Cases | Retail, subscription boxes, PR kits, and eCommerce gifts | Warehouse fulfillment, bulk product delivery, B2B shipments |
* Additional flute options and double-wall corrugate available upon request.
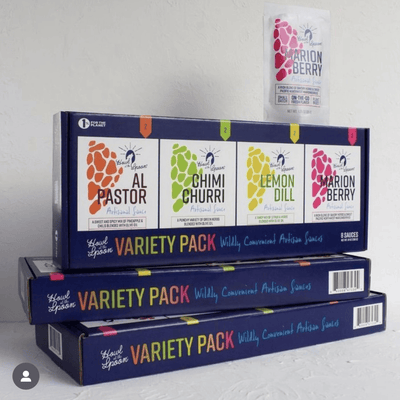
Branded Packaging That Steals the Show
From bold prints to clever reveals, explore how real customers turn custom boxes into powerful brand moments. Tag @box_genie to be featured!
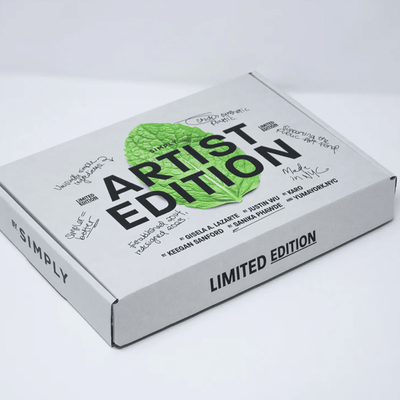
The limited edition artist box! This edition is an ode to our NYC roots and beautiful packaging.

Boxes up and ready to roll!
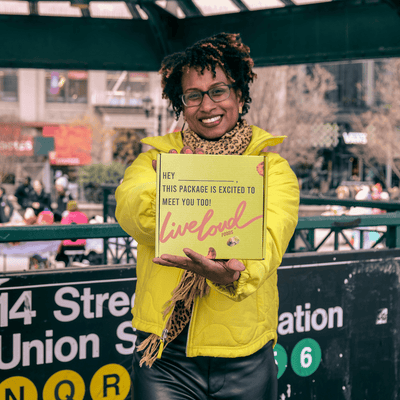
We came to play!
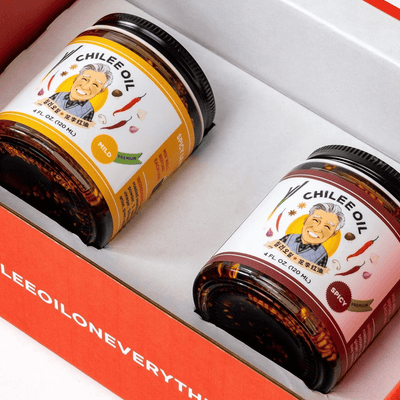
We helped @chileeoil with their new gift set.

Jackson Hole's only made-to-order coffee roasting company. Love and care goes into each small batch of coffee we hand roast!
Check out our website to get yourself a box today!
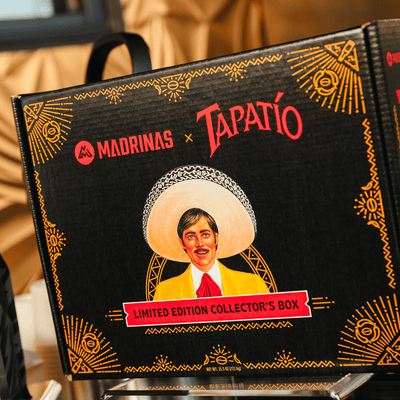
Madrinas x Tapatio collab box!
Thanks @box_genie - you've done it again.
